Jiblet design – update

I’ve been continuing my experiements on the jiblets.

Leading edge angle

The first issue was the approach angle of the leading edge. The symmetrical aerofoil has a leading edge angle of 90º. This means air will not flow round the leading edge of a sail with this shape.

The larger the angle the more forward thrust we’ll get from the sail but the lower the angle we can go into wind (larger tacking angle). Conversely a smaller leading edge angle will improve the angle we can go into wind but will reduce thrust from the sail. Ideally we’d optimise the angle for Velocity Made Good (VMG) given the performance and drag of the boat, but we just don’t have enough information so a reasonable guess will have to do.

The hard-sheeted jib angle on my hull (Wanderer dinghy) is approx 12º. To allow air to get past the mast, plus allow for the extra drag of a junk rig I’m assuming that the jiblet angle of incidence will be around 15º. This means that the maximum leading edge angle should be around 30º (45º – 15º = 30º).

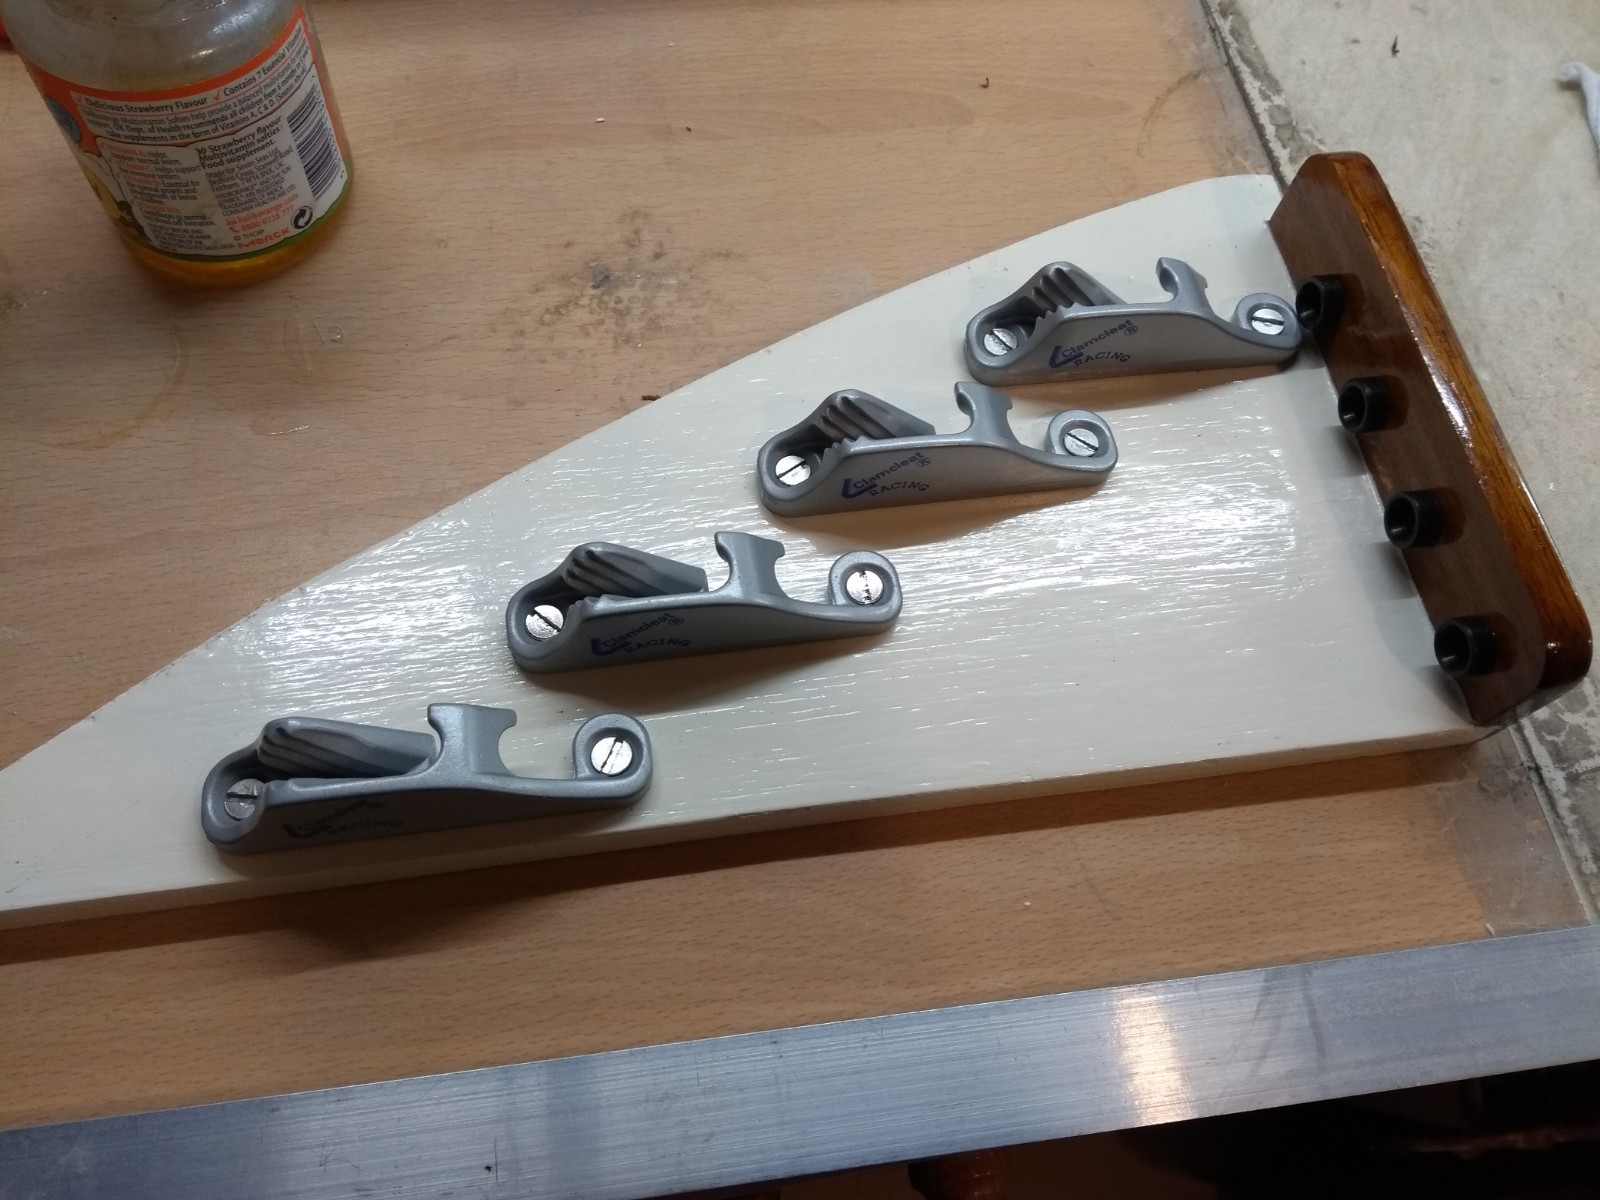
Playing on airfoiltools.com I came up with this shape that seems to look about right – and something like a sail.

9% camber at 35% chord; 1% thick from airfoiltools.com
Continue reading

Jiblet design

No – not the guts of a chicken. The jiblets in a Split Junk Rig are the small jib sections in front of the mast. Since they are in clean air in front of the mast they should be more efficient than the main sections (mainlets?). hence they can provide a critical part of the drive of the sail. So their design is important.

I’ve been playing with some prototypes. The established thinking is that an angled shelf foot design is best, with the caveat that the actual sail shape will be different to the shape you think you’ll get. This tends to make me think ‘why?’ and try to understand how to get a predictable shape, when I should probably get on, make the thing and go sailing.

Ok – so first I tried a barrel cut jiblet. This was built into a panel with batten pockets and tapes to see how it all worked.

Barrel cut jiblet
Continue reading

Split Junk Rig sail plan

With the mast nearing completion it is time to finalise the sail plan. I’ve been using a scaled-down copy of the Poppy plan for the preliminary design. I’ve now followed through to make sure everything works ok.

As recommended I built a string and stick model of the sail. This is the first attempt – a copy of the Poppy rig. With old garden bamboo it looks pleasingly authentic!

Stick-and-string model – first iteration
Continue reading

Owl: my current junk-rigged boat

I thought I’d describe my current junk rigged boat and show some of the design features. The boat is called Owl because it is green (as per The Owl and the Pussycat).

The boat is a 11′ GRP clinker-style boat originally built in the early 1980s for a gentleman to take his kids out in. I suspect it was adapted from a standard hull – probably designed for rowing or fishing. It had:

  • A flat centreboard that is a bit far aft;
  • A rudder that only just touched the water;
  • A standing lug rig that wouldn’t go upwind, with heavy yard and boom that reduced stability and threatened to hit heads.

However it did have a free-standing mast and, without the lug-rig up, was extremely stable. A perfect candidate for a junk rig!

Continue reading

Mast partners sorted!

Figured out how to secure the mast at the partners. The rear chock now is ornamented by two bits of aluminium:

  • A plate on the bottom at the back to stop the back rising when the chock is pulled towards the mast;
  • A lashing point on the top of the block.
Rear mast chock with aluminium bits

In use it works like this:

Mast lashed in position

This is quick and easy to set up and very secure. I can lift the bows of the boat by pulling on a line to the mast top without any sign of the mast or chocks moving. As with all these things, once you figure out how to solve the problem it is easy and obvious.

Update 26/10/2023

I found that the block had a tendency to tilt and jam over the course of a few days, so now I leave the block out and just lash the mast to the front support. This doesn’t look as nice but works fine.

Mast update

Got the mast strengthener in today. I was assuming that it would just slide in; however it jammed after a bit probably due to grit somewhere. Every time I took it out and cleaned it up (filing off the scratches) it jammed again, so I hammered it in using a wooden mallet. Fortunately it went all the way in without jamming completely. Phew.

Strengthener in with the aid of 3-in-one oil and a big hammer

I put the mast foot back on with locktite thread lock on the screws – I don’t want them coming out under sail.

Continue reading

Calculating junk rig sail camber

I want a cambered sail for the advantages it gives us – better performance particularly close to the wind. There are disadvantages for ocean travellers – the sail can flap about in light winds and swell – but these don’t affect a dinghy (hopefully!).

This is my approach to calculating how to make the sail. There are others, and there may be errors in my calculations – if you spot any please let me know.

If you want to skip the maths there is a spreadsheet that you can plug the basic figures into. The maths is just to explain what the spreadsheet is doing – for me as much as anyone!

Update: before you build anything from this please read subsequent posts:

These cover tweaking the edges of the cloth to get good shape in the forward part of the panel.

Continue reading