
I’ve been giving some thought to how to attach the mast to the boat. There are a number of objectives:
- Must be strong enough
- Must be light
- Should not change the boat too much – ideally the boat should appear to be standard
Update 26/10/2023:
Please note that the Wanderer hog probably isn’t strong enough to take the loads of a free-standing mast, and the consequences of failure could be extreme (death, severe injury). I’ve left this page here for historical interest, but please see my later pages for details on reinforcing the mast foot.
Foot or heel
The heel of the mast can be fixed to the existing rack. The rack looks something like this:

The holes run the entire length of the rack. It is fixed to the hog – a substantial length of ply running from the centreboard to the forward buoyancy compartment. This should be strong enough to take the loads – finding anything stronger will be hard.
I’ve bought some 5mm stainless steel rod on EBay. I’ll use this to pin the heel of the mast to the rack. The heel will look something like this:
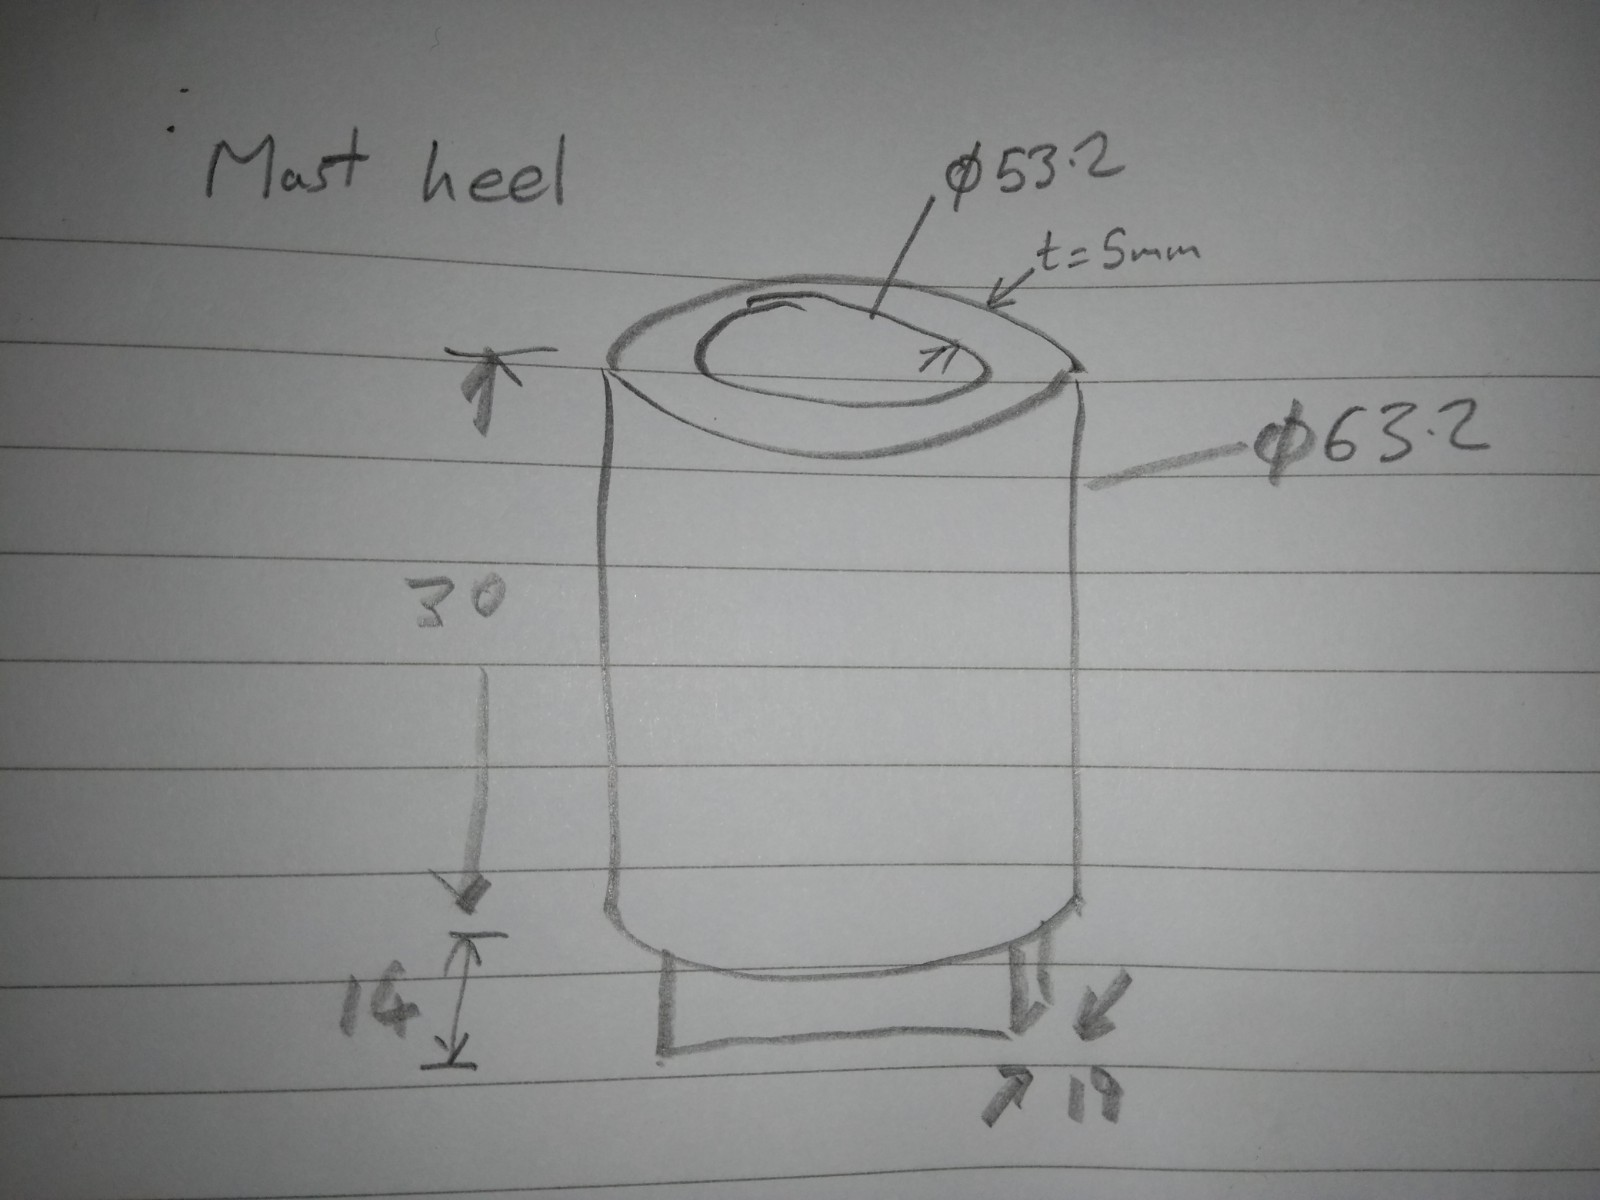
I’ve got a lump of aluminium (again from EBay) that I’ll machine down to this shape. It won’t be exactly this shape as I need to allow for the mast to pivot on its tabernacle pin as it is raised. Ideally the heel fitting bottom should be curved to allow for this. I might curve it on a belt sander or just machine it with a chamfer on both sides. The diameter of 63.2mm is the measured internal size of the main mast tube.
Deck or partners
The upper point where the mast connects to the hull is known as the partners. I’ve made wooden chocks to fit into the slot in the Wanderer’s deck:
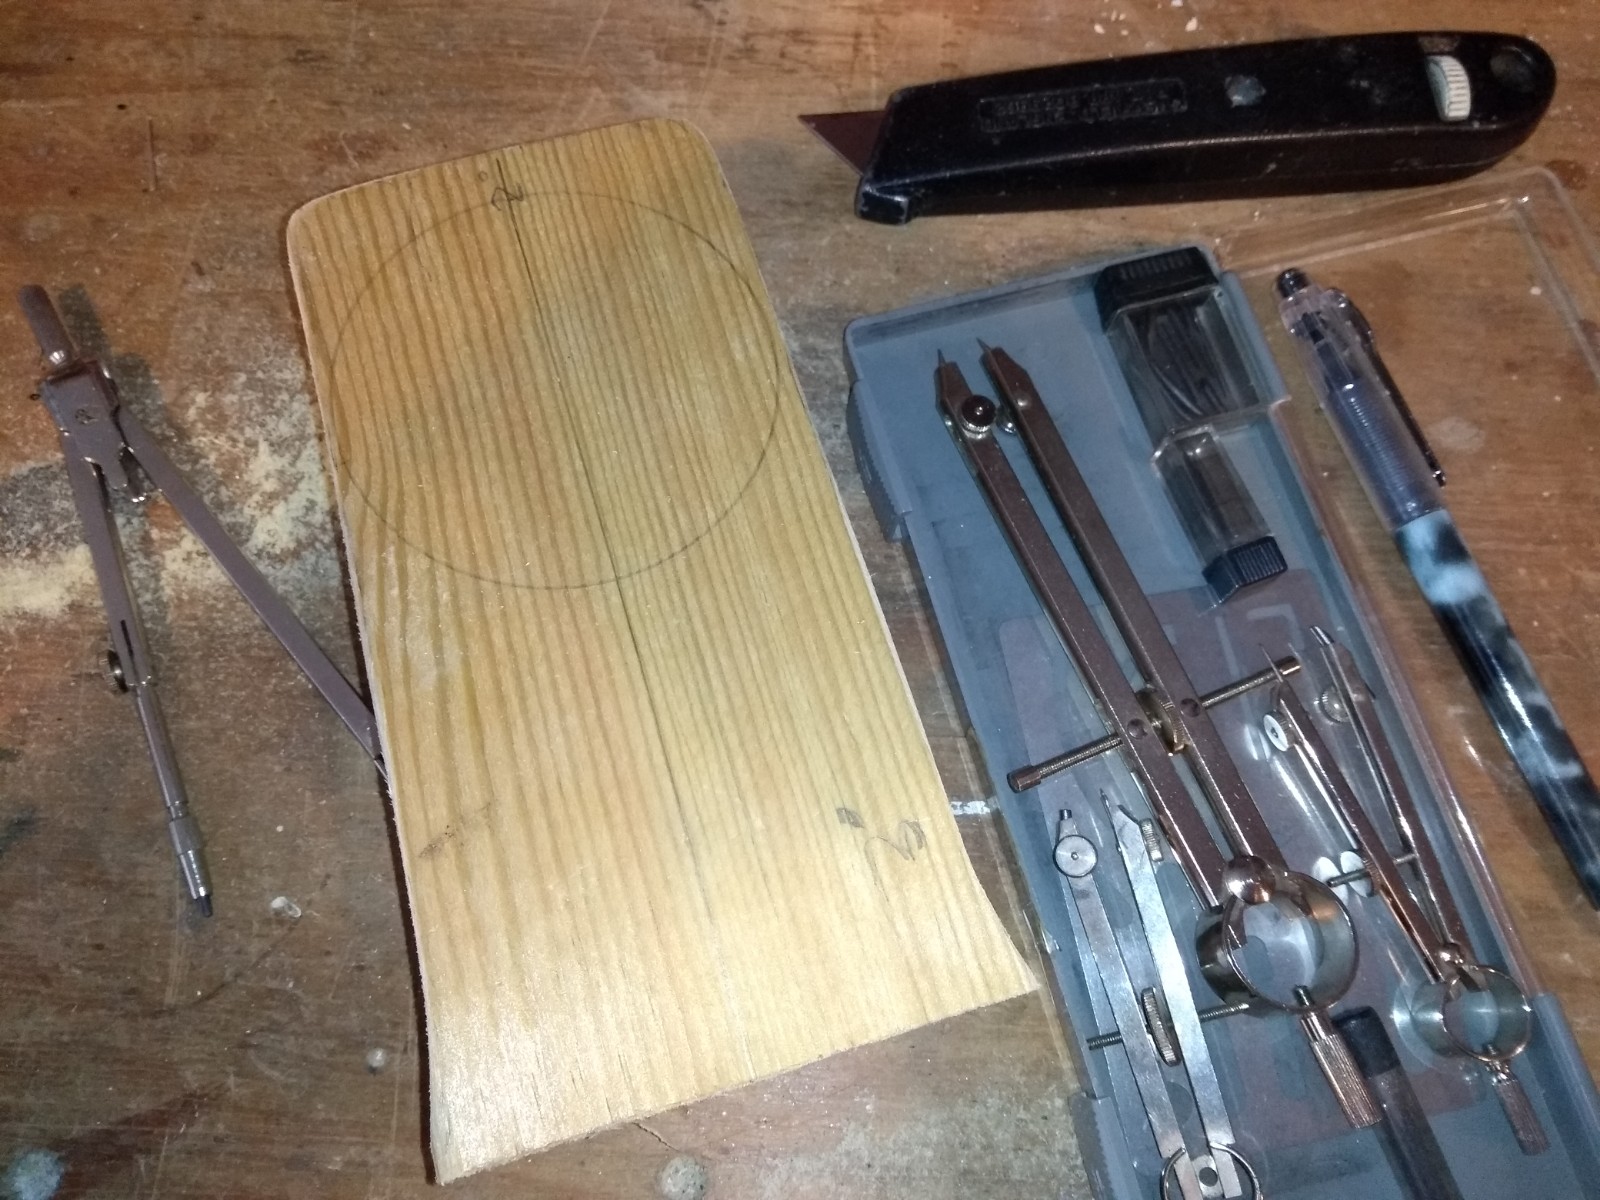
The wood is some C16 pine (possibly Scots Pine) that I’ve had lying around for ages. It has nice straight grain and few knots.
I put the wood over the slot in the deck and marked it up with a pencil.
I measured the angle of the chock at 3º using a machinist’s protractor, so I set the bandsaw to this figure and cut round the pencil line. Much to my amazment it fitted perfectly. Next stage is shown in the picture above – mark out a 70mm circle for the mast for cutting on the bandsaw.
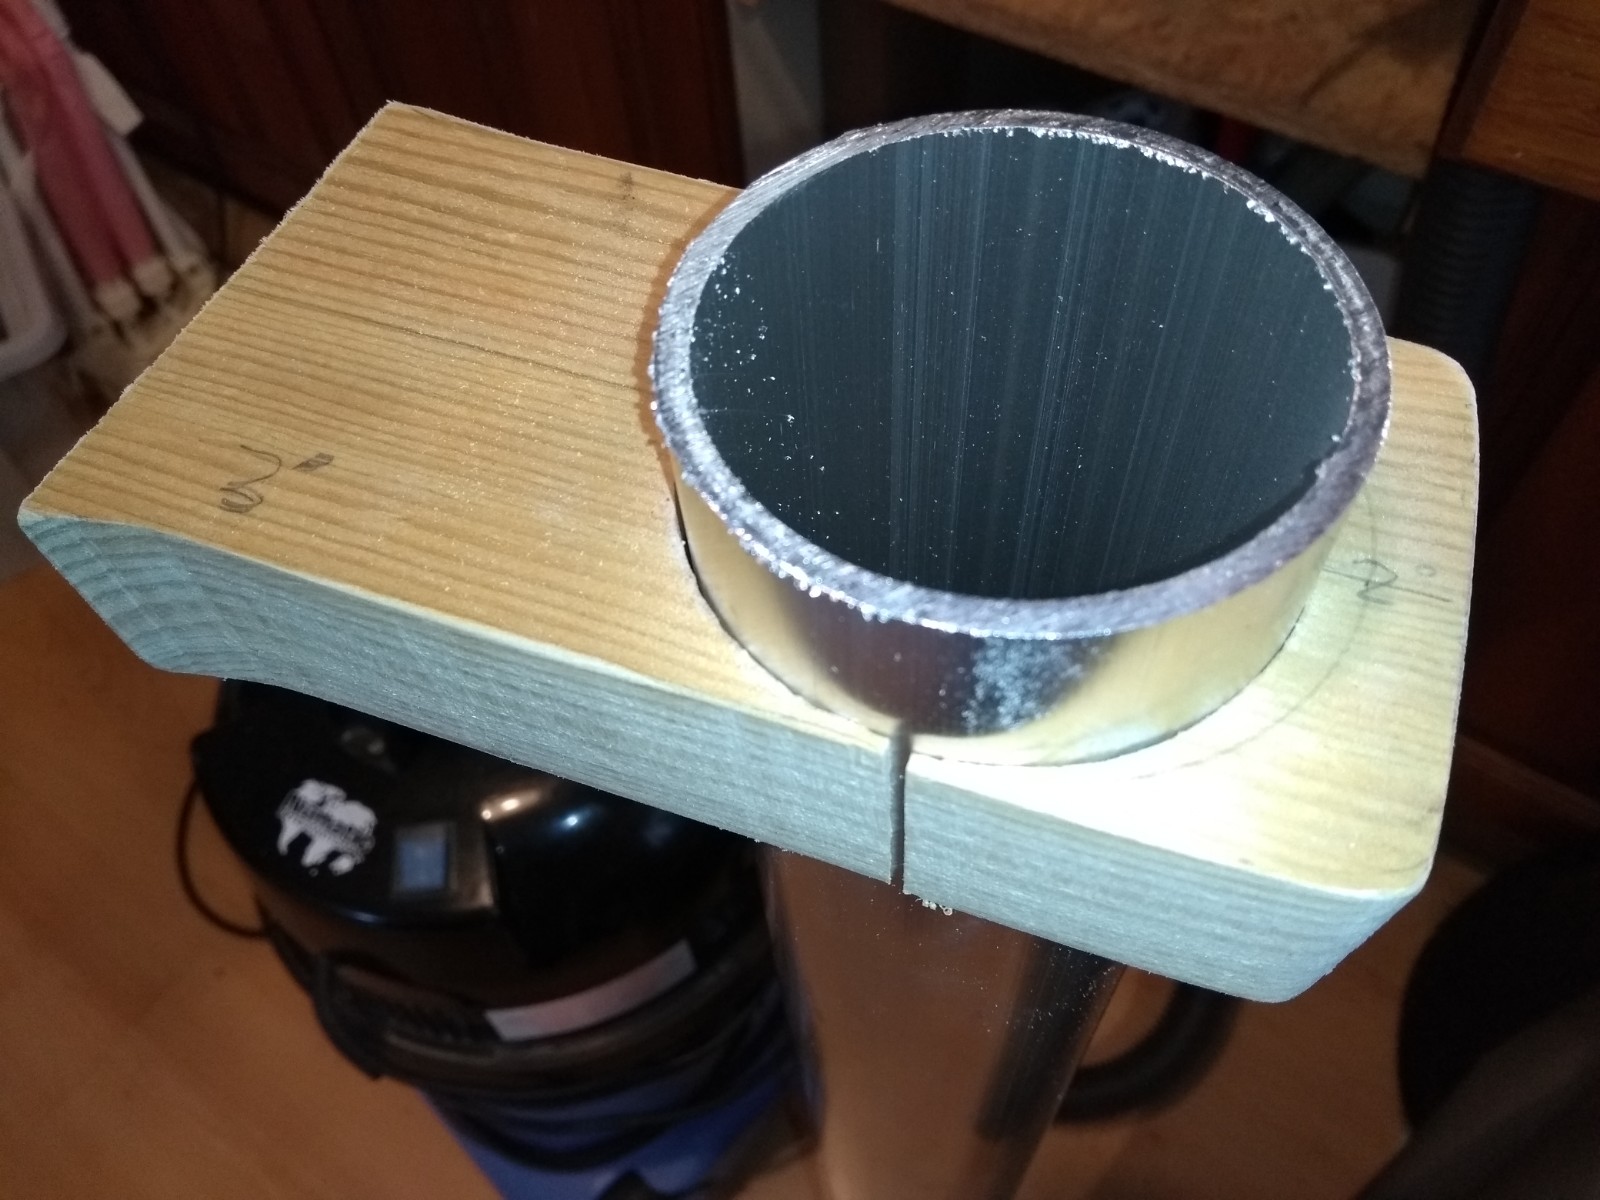
The chocks fit nicely. The front chock will be screwed into position semi-permanently. The rear one needs to be removable so the mast can be taken down easily. I’m not totally sure on how I’ll do this but the current plan is a long bolt from side to side of the chock, through the walls of the slot in the deck.
