
The torsion rubber suspension in my boat trailer was worn out. It was about 40 years old so the rubber had compressed and become hard resulting in no springing. In addition the hub bearings were noisy but hard to replace – they were ball bearing hubs with no easy way to get the old races out. So I decided to replace the lot.
Trailer suspension units are designed to be bolted to metal plates welded to the trailer chassis. However, the only chassis member available already had the old rubber suspension units inside it with no obvious way to get them out. This meant that any attempt to weld to the chassis would set fire to the rubber. It would also destroy the galvanising on the chassis. So I wanted to clamp the new suspension units onto the chassis.
I weighed each wheel and the tow hitch with my bathroom scales, then added up the readings to get the overall weight of around 250kg. 250kg suspension units are available but I wanted a bit more than that to cope with additional kit in the boat. It isn’t a good idea to have units rated much higher than you need as the suspension will be harder resulting in more vibration transmitted to the boat. So I bought 350kg Avonride units with the standard taper roller hubs.
Out with the old
I cut off the old trailing arms with a hacksaw.
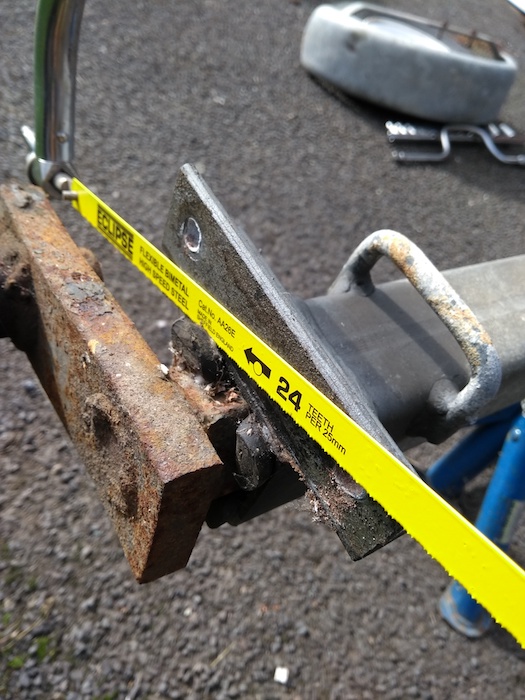
I had intended to use an angle grider but a new hacksaw blade worked fine, has less risk of damage to other parts, and I needed the exercise. It took about 10 minutes per side.
Fitting the suspension
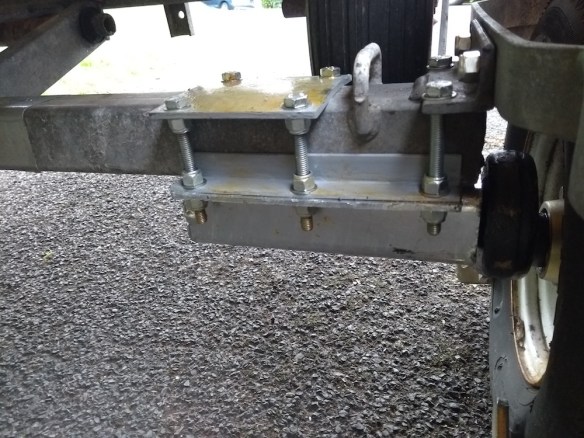
I used high-tensile 8mm machine screws (threaded the whole length – bolts are partly threaded) with nyloc nuts. The two screws nearest the wheel pass through the mudguard bracked – a substantial bracket welded to the chassis. The other 4 screws are held by a cut-down suspension mounting plate. The plate is a bit thin – it bends when the screws are tightened – so the nylocs under the plate pass some of the bending force into the screws to help keep everything rigid. If I was doing this again I’d probably just use angle-iron for the clamp plates.
The suspension units must be located fore-and-aft. We don’t want anything moving if we hit a bump – at worst the trailer might swerve and at best poor wheel alignment would scrub the tires bald in no time. So there are two sections of angle iron to locate the suspension unit on the chassis member. These are clamped by another set of nyloc nuts. The holes must be drilled accurately so nothing can move. It certainly seems solid now.
I wanted a second opinion that this was safe so I took the trailer to a local engineering firm. They were happy with the setup, but offered to weld on the angle-iron to make sure that there was no risk of failure. Cost was £5.
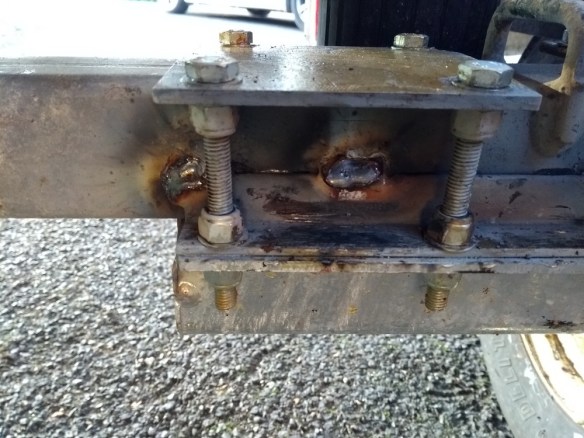
Welds to make doubly sure all is secure
The observant will have spotted that the trailer will now sit higher than before. Actually it sits a lot higher – the suspension units mounted below the chassis add 50mm to the height but the biggest effect is the trailing arm angle. This used to be more-or-less horizontal but now is about 30º. More about compensating for this in a future post.
Hub notes
I’ve had problems with the bearings fitted to trailer taper-roller hubs. I’ve also had the standard grease nipples break off on first use. Since I don’t want to be stranded by the side of the road I decided to replace both the bearings and grease nipples with good quality items – Timken units for the bearings and UK-manufactured grease nipples from Ebay. Changing them over isn’t hard but is a pain – I would have preferred to buy better hubs.
The old bearings hammer out easily enough. There is a recess in the hub to allow access. I use a brass drift to put the new units in.
The end of the brass drift gets chewed up quickly, particularly when putting the shells in as the edge of the bearing is small. I found it important to clean this up regularly:
- A chewed up edge doesn’t make for good contact with the bearing
- The drift tends to disintegrate leaving bits of brass inside the hub.
I cut off the end of the drift in the lathe every few minutes to get rid of the chewed up bit.
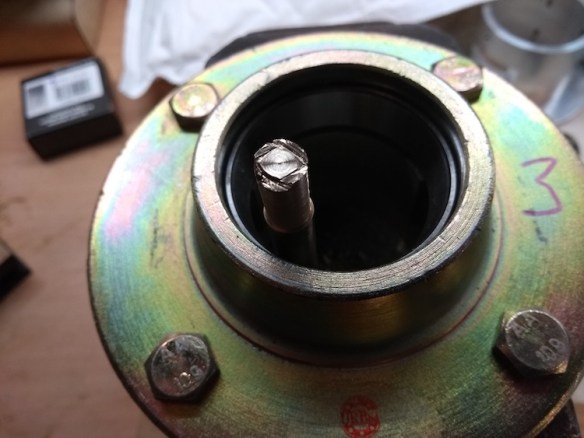
Note the number 3 on the hub. Each bearing assembly is a matched set and MUST NOT BE MIXED UP. I numbered the boxes containing the rollers to match the number on the hub.
Once everything is together it is worth spending some time getting the inside of the hub really clean. Any spec of brass or dirt could cause bearing failure. I found oil plus kitchen towel effective at picking up specs of brass.
Time will tell whether it all works ok…

Pingback: New Trailer for Custard | Martin's Blog