
My eldest daughter asked me if we could make a bow and arrow for her. She’d done some designs and wanted to make them.
We watched some videos on YouTube on how to make bows and had a go. The first attempt broke.

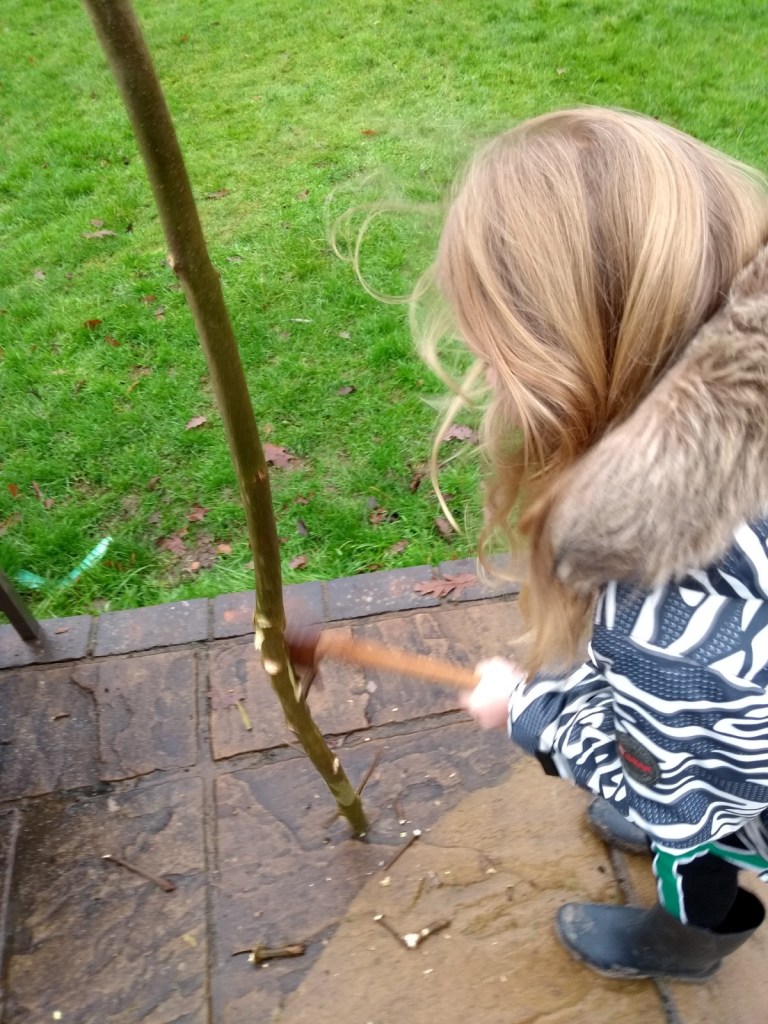
So we tried a different approach. I’d cut down an Ash sapling in the garden a few months ago – we’ve got Ash trees at the bottom of the garden so we get saplings growing everywhere. The top of this was about the right stiffness for a bow. So we cut off a suitable length and started work.
There are some key design points to making a bow. Any wood that is weak enough to bend is likely to break, so the idea is to trim the wood in such a way that it is still strong, bendy but doesn’t break.
- A longbow bends less for a given pull than a shorter bow. Thus we went for a longbow.
- The wood grain down the back of the bow (the bit facing away from the archer) is in tension. It is very important that the back is formed of one line of wood grain running from one end of the bow to the other as this will provide maximum resistance to fracture.
- The belly of the bow (the bit facing the archer) is under compression and thus unlikely to break. Thus this is the bit we trim to get the right bendability.
- To avoid stress concentrations in the bow we want an even bend from end to end. On YouTube achieving this bend is called tillering and takes some time. We just bent the bow between hand and floor to see what it looked like.
Our sapling was already a bit bent so we went with that bend for the final bow. The worry was that if we didn’t then the bow would try to turn when pulled. There are knots in the back of the bow but, since this wood is ‘as grown’, the wood fibres run around the knots reinforcing these areas. The wood is also still green which makes it more resistant to breaking.
After using an axe to get rid of any twigs, and a saw to cut the bow to length (a bit taller than the archer) we trimmed down the belly of the bow on the fatter end to try to get a uniform bend under load.
We then cut notches with the saw in the sides of the bow for the bowstring. The string is 3mm nylon that I’d bought for putting a flag on one of my boats – not the ideal material but ok and I’ve got lots.
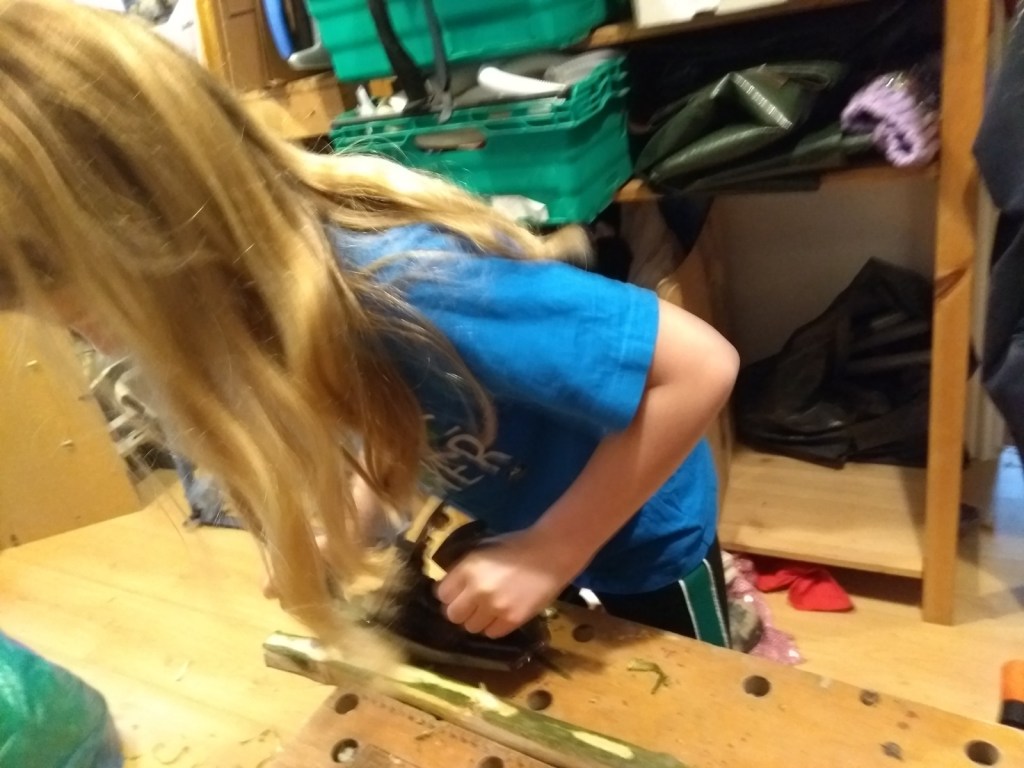
We also needed to make an arrow. My daughter had found a stick she wanted to use so we went with that.
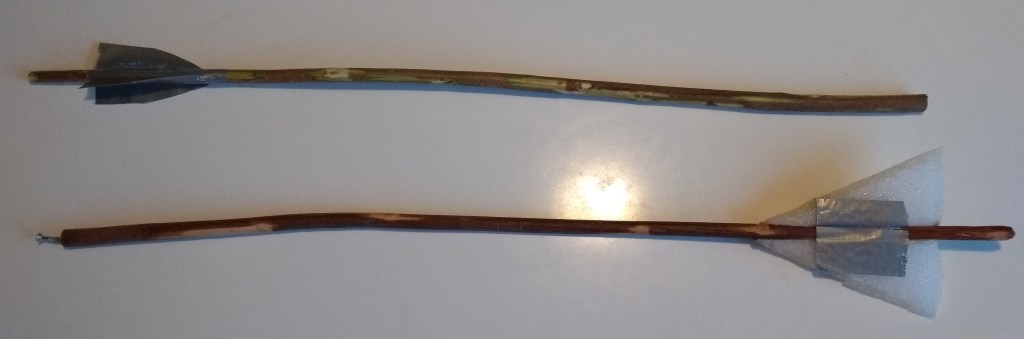
For the first version we used foam flights stuck on with double-sided sticky tape and gaffer tape. The front was weighted with a screw as the stick is rather light. This arrow works ok but the flights don’t bend which required us to shoot the arrow on the right-hand-side of the bow. This works fine and Shad says it is ok 🙂
The second version uses gaffer-tape flights. These work really well and take seconds to make. A short saw cut at the back end provides a notch for the string.
It is worth mentioning arrow safety. Obviously anyone standing in front of the archer could get hit so care must be taken. However, there is a big risk from arrows breaking. The obvious way to make arrows is from dowel. This doesn’t always have the wood grain running down the length of the dowel and can break under load leaving a sharp point. The point can easily go through the archers hand. Making the arrow from a stick avoids this problem as the wood grain will always run within the stick, although we still need to be careful.
She loves using the bow and arrow. It isn’t easy to use – there aren’t any marks to show where to put the hand or arrow, plus the arrow must be balanced on the thumb to hold it in place. The pull is at her limit. It took her about half an hour to get the hang of shooting it. She can get the arrow about 50′ / 15m, although accuracy is low.
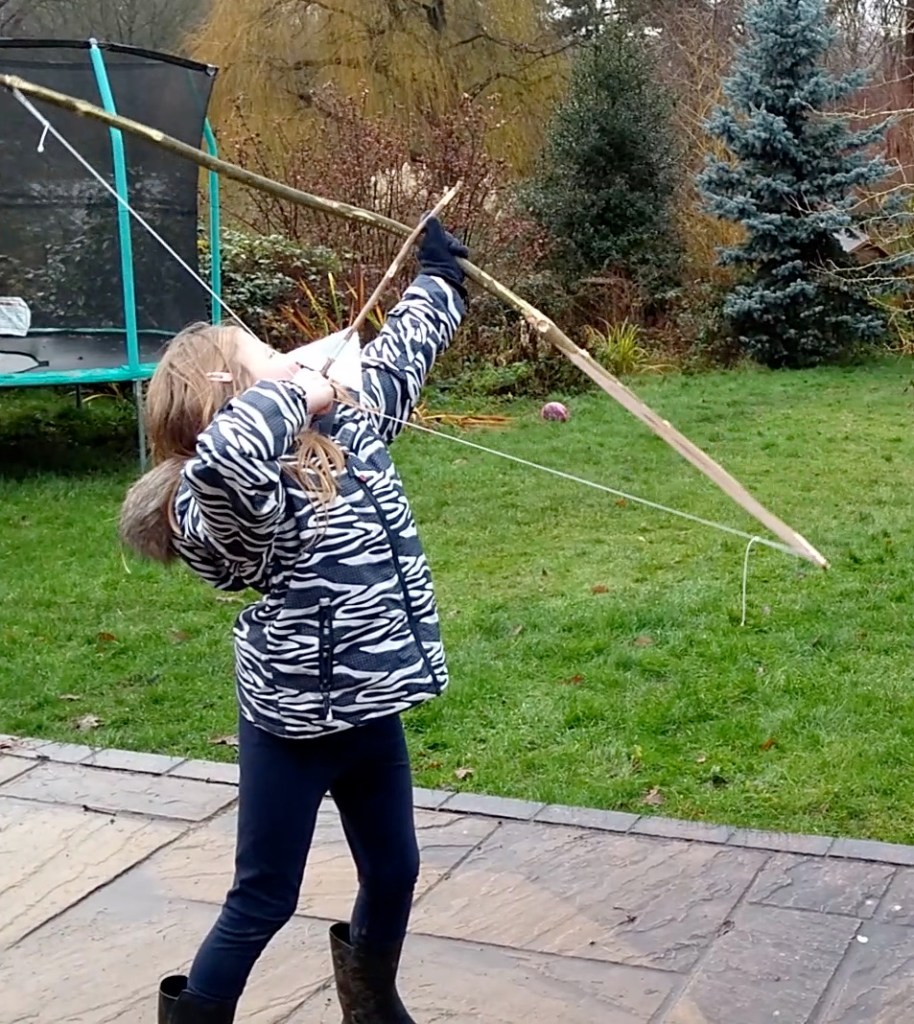
Pretty good for something that only took an hour to make, cost nothing and with my daughter doing much of the work.
