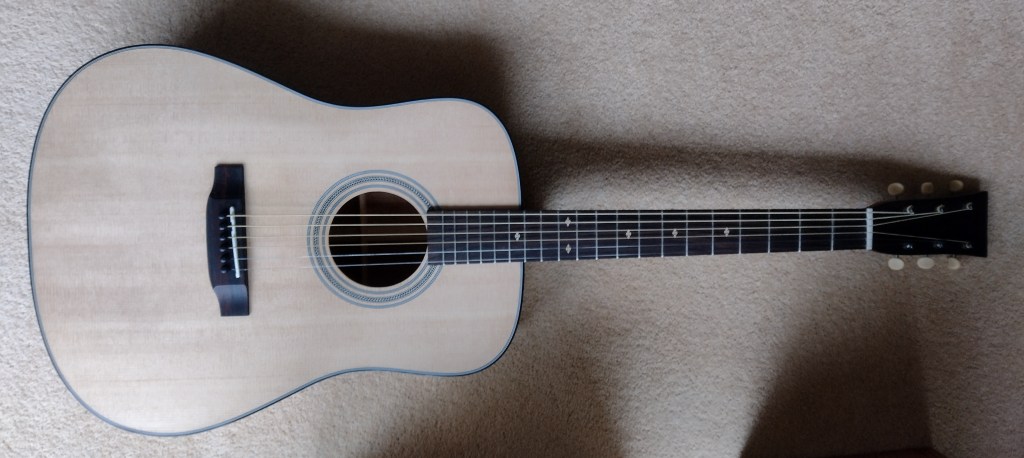
TLDR: It is playing and sounds good.
Now for the details…
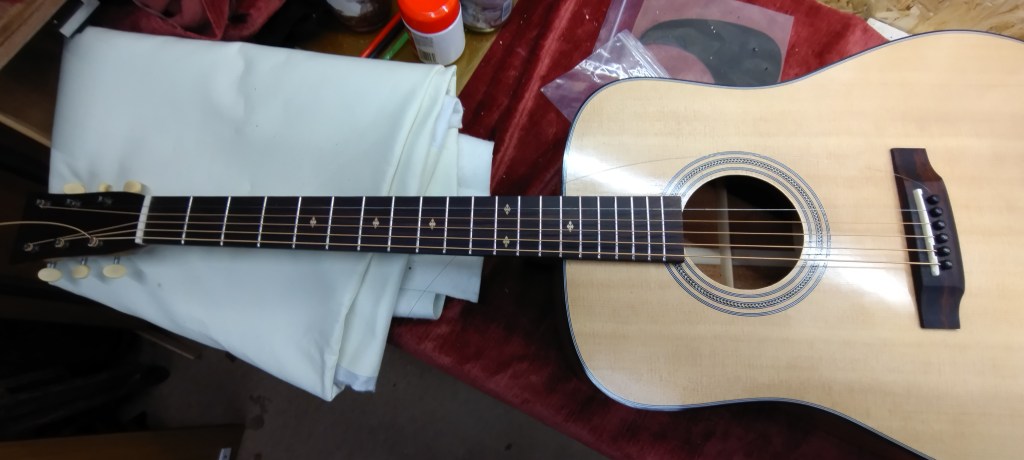
Gluing neck on
This went on easily enough. I didn’t bother with cauls – there didn’t seem to be a need. I did this in the house as the workshop was too cold for the glue to set properly. Note the masking for the bridge – more on this later…
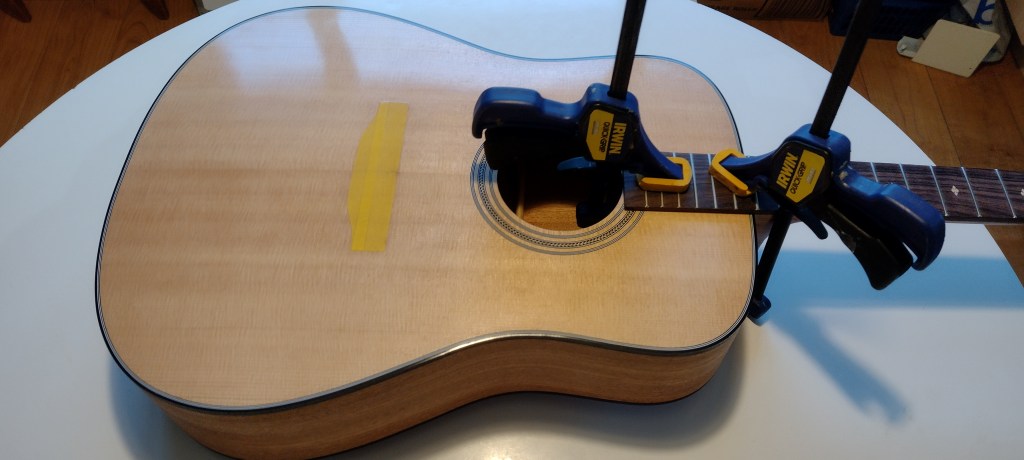
Gluing bridge on
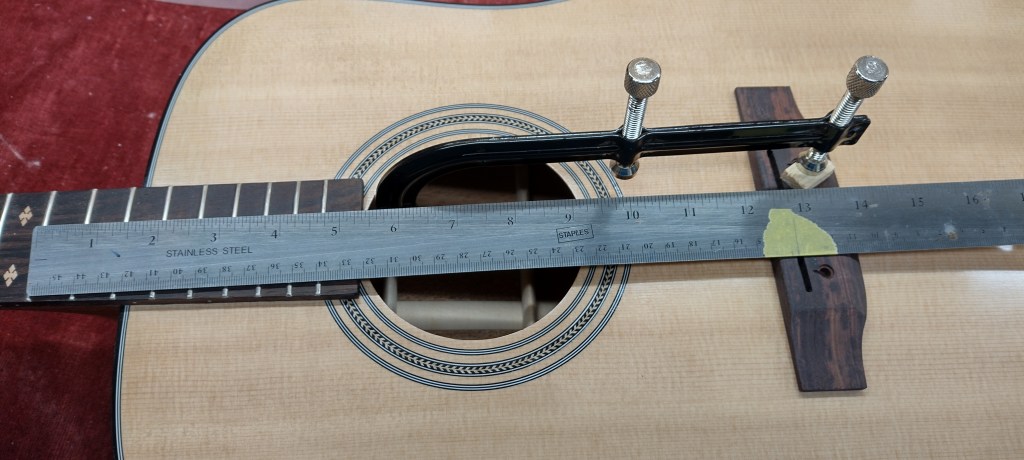
The bridge location is critical – if it is incorrect the intonation of the frets will be out, and an out-of-tune guitar doesn’t sound good.
There are extra challenges:

- The guitar top is curved, but the bridge isn’t quite as curved, so it tends to pivot around
- I got the masking tape for the bridge in slightly the wrong place – I didn’t take the compensation factor into account. So I had to remove the masking tape and refinish the top again. Actually twice – the first refinish was blotchy.
- The caul supplied with the kit that goes under the top tends to fall off whenever possible, so getting it and the clamps in place is tricky. Masking tape and being quick with the first clamp is the answer.
I made a one-piece caul to fit over the bridge.
StewMac were kind enough to send me a $25 voucher which paid for a couple of cheap clamps. I had free shipping from when I bought the kit. The clamps worked fine and two were enough – the ends of the bridge needed pulling down to meet the top so missing a clamp in the middle didn’t matter.
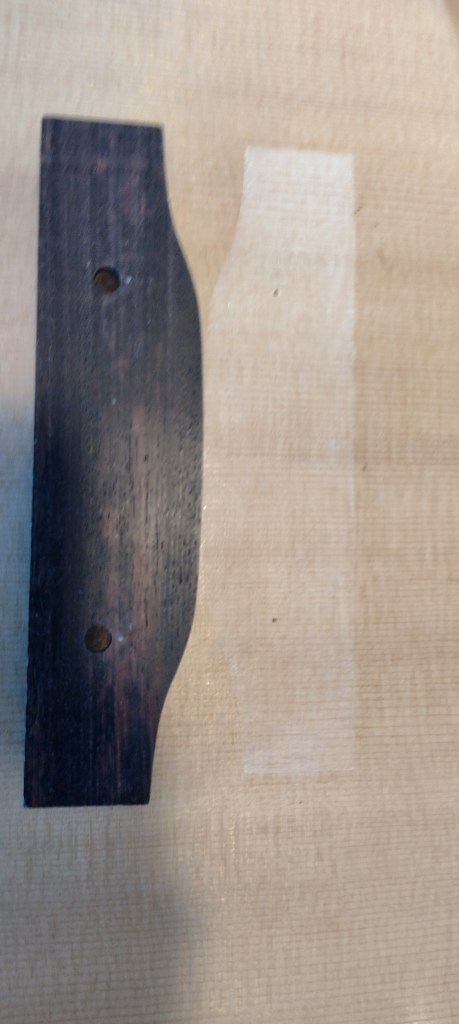
Once the bridge is located I drew round it with a scalpel to just cut through the finish – not the top. The finish inside the line must then be removed to provide a good gluing surface.
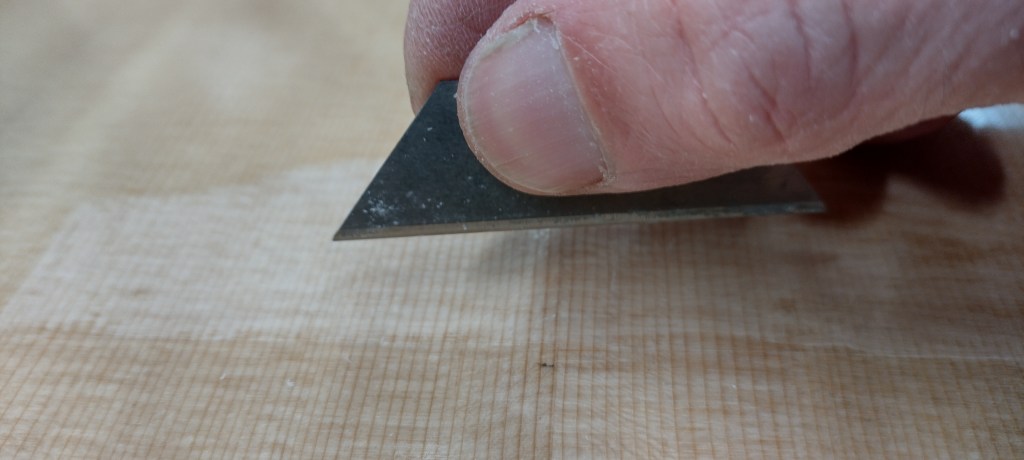
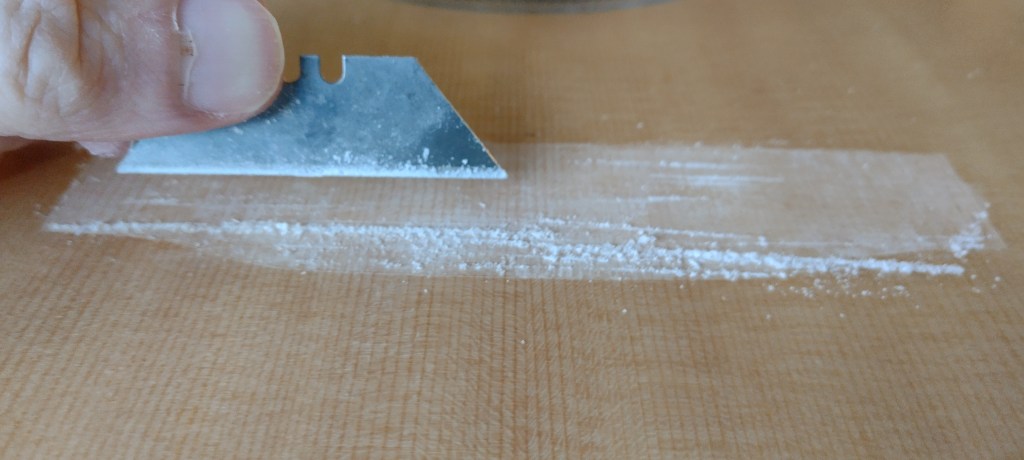
Fortunately shellac is fairly easy to scrape off without needing any kind of paint remover (e.g. meths for shellac). It took maybe 1/2 hour to get it back to bare wood.
Trying to glue flat surfaces together with precision is ridiculously hard. I use the method shown by Jerry Rosa in his YouTube channel – put a couple of small pins into the wood to locate everything. Makes it much less stressful.
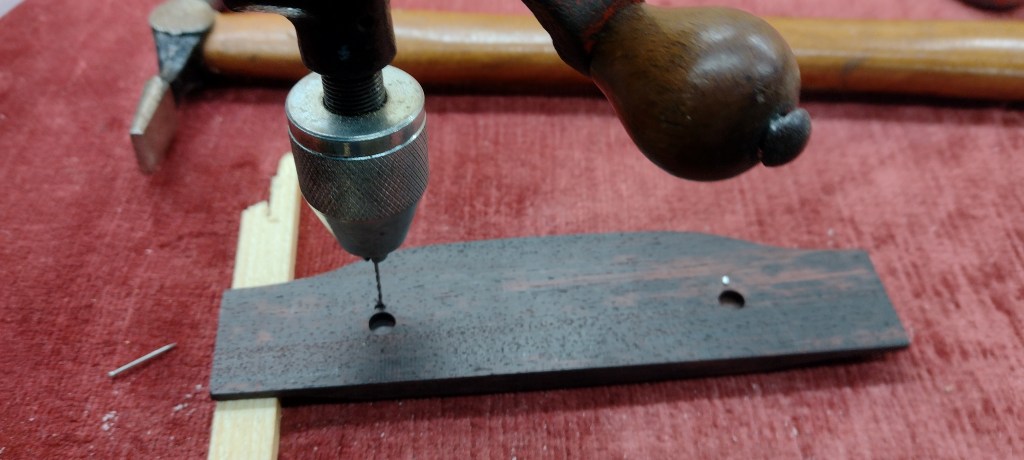


I kept wiping off the squeeze out and prayed that it was in the right place…
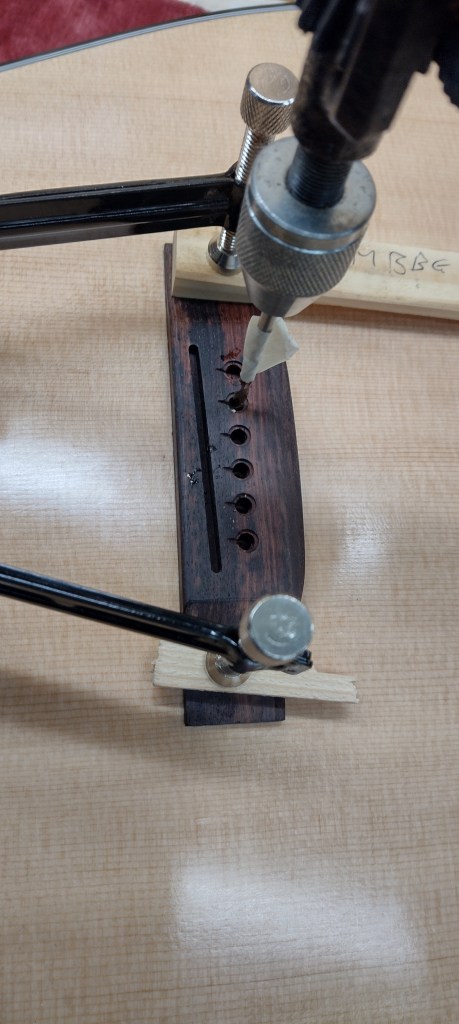
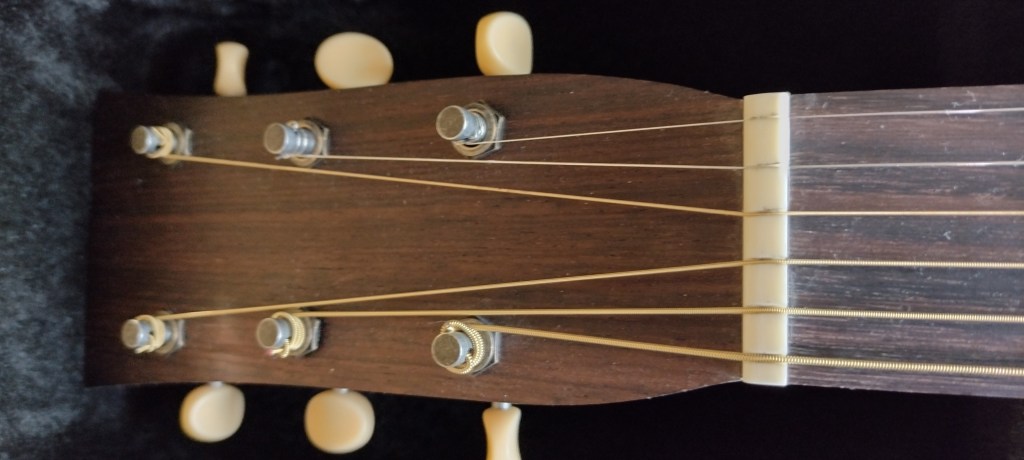
I then reamed the holes using the 3˚ reamer from StewMac. This wasn’t cheap but I couldn’t think of another way to do the job. The reamer certainly works well.
I screwed up the first set of strings – didn’t get them on the tuners right. I bought another set of strings (Martin Extra Light) and watched a video on tying them to the tuners and got it right the second time.
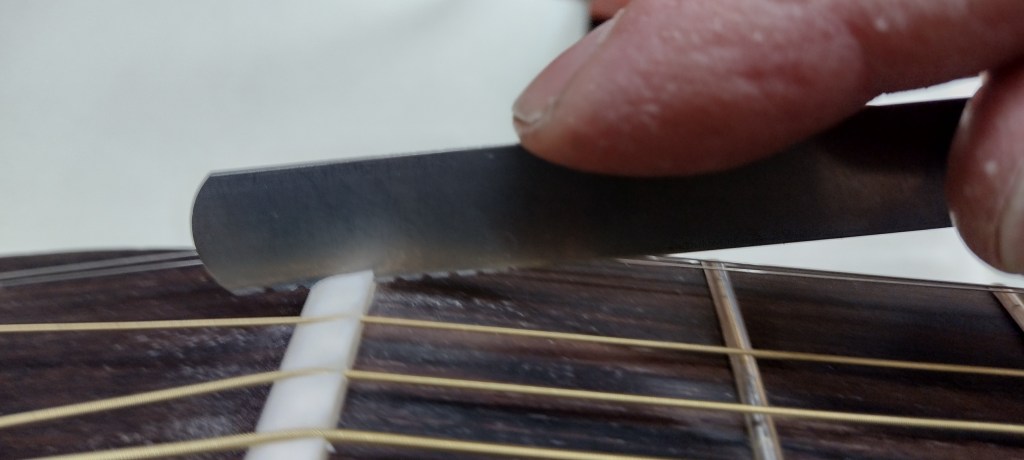
I needed a set of files for the nut. These are expensive to buy but easy to make. A cheap set of feeler gauges is the starting point. Use a small thin grinding wheel to cut slots at the edge across all the gauges.
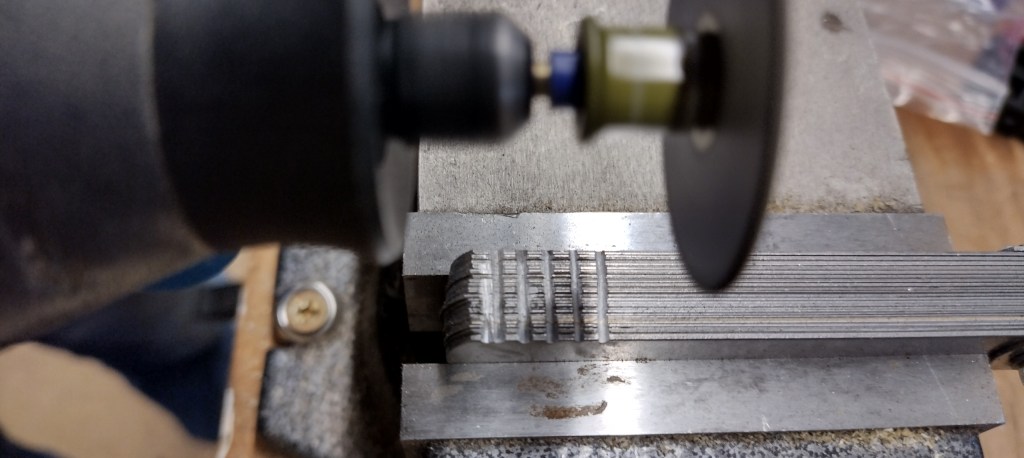
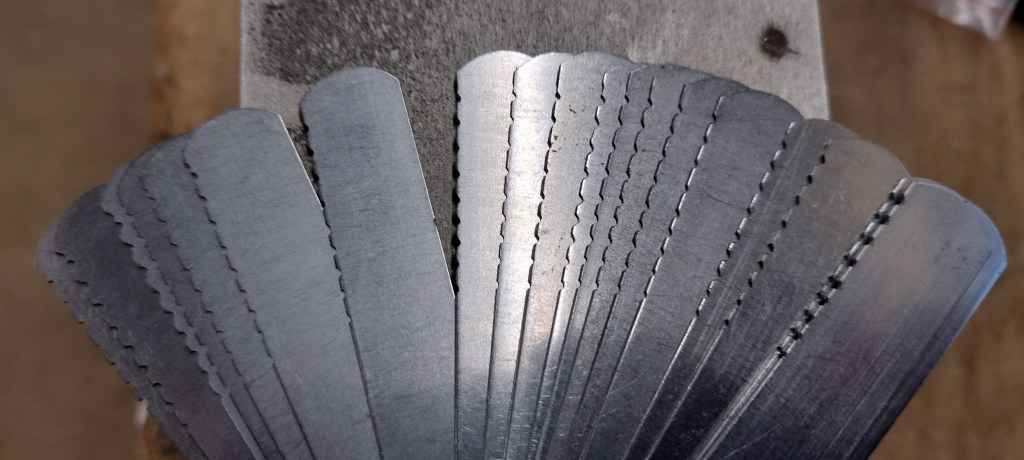
These work very well. They don’t cut fast but I don’t want them to – I’d rather they were slow. I found that using a width slightly under the string width worked well – there is always some sideways movement of the file.

It is necessary to work on both the nut and saddle height to avoid over-lowering one end. I got the action to the figures specified in the StewMac instructions and it seems to work well. I didn’t have any fret buzzing to sort out.
What does it sound like?
Seems pretty good. I’m not experienced in guitars but it does have the ‘shimmer’ where the strings interact with each other in a lovely way. It is certainly loud. It responds well. I’m not a guitar player and normally don’t like them much, but I’ve been playing this one (badly) just to hear it.
I’ve still got a couple of jobs to do – finish the surface of the nut down to string level and attach the pick guard. I also need to add a label with my daughter’s name on it.
Conclusions
I’ve learned a lot building this guitar. I already had some experience with making ukuleles so I wasn’t starting from scratch with experience. Here’s some points off the top of my head.
- The kit is good, instructions are clear. Previous experience will help to get a good result. I wouldn’t recommend the kit to anyone who hadn’t done much precision woodworking before.
- The biggest issue with making any instrument is not messing it up. It is not normally possible to recover from mistakes so there is huge pressure to get it right. A careless chisel or just moving it on the bench and bashing into something can cause a big problem.
- Getting the neck-body joint done took a long time. I might be faster next time.
- Finishing the guitar took a while, mostly because I’ve never done French Polishing before. By the end I’d figured out how to make it work – at least in a cold UK winter workshop. It would probably need to be a different technique in warmer weather. I still need to figure out how to fill the grain properly.
- Masking tape and spruce guitar tops don’t mix. The masking tape pulls bits of spruce off. Similarly pencil marks cannot be sanded off – otherwise you get visible uneveness in the top.
Would I do it again? Yes, definitely. The next one would be quicker to build and better finished. However, I don’t play the guitar so one is enough for now.
Update 23 January 2024
Properly finished now. Got the nut filed down so it looks much neater, the label in and the pickguard on.